Easy Beginner Crochet Blanket Pattern and Home Projects
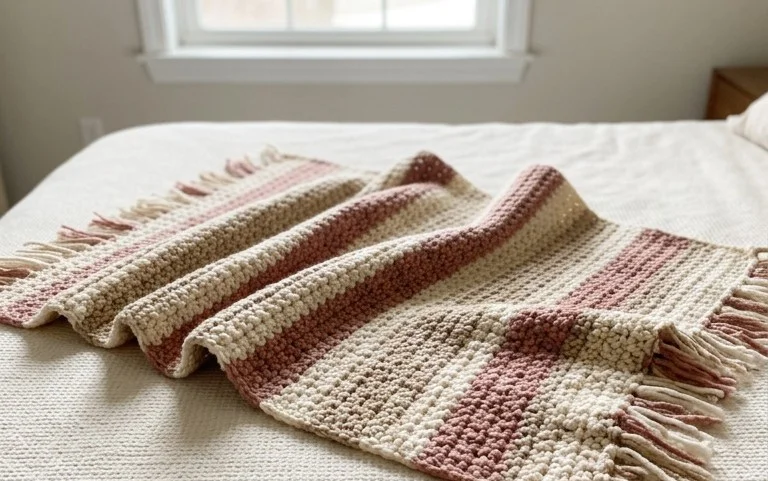
A handmade blanket draped over a wooden chair adds instant warmth and a soft texture to any living room, especially when made with your own two hands. Creating your own home accessories is a deeply satisfying way to spend an afternoon because you see progress with every row you complete. This project is suited for anyone just starting their journey with a hook, as well as those who want a relaxing task for their busy evenings. You will learn the foundational techniques of working in joined rounds, which forms the building blocks for many larger household items, including blankets and baskets.
Why You’ll Love This Pattern
This beginner-friendly crochet coaster pattern provides an excellent introduction to working in the round while producing a practical, home-essential item. The design relies on basic single crochet stitches, making it a meditative project that is easy to pick up and put down during busy days. Because these coasters use minimal yardage, they function as an ideal stash-buster for leftover cotton yarns. You can create a complete set of four in a single afternoon, and their durability makes them a thoughtful, handmade gift for housewarmings or coffee lovers.
I managed to finish a full set of these in an evening while watching a movie. The pattern is very easy to follow and the finished coasters lay perfectly flat on my coffee table.
— Sarah, casual crafter
Pattern Overview & Skill Level
- Skill Level: Beginner
- Approximate Time: 30 minutes per coaster
- Construction: Continuous rounds using basic circular increase methods
- Finished Dimensions: Approximately 4 inches in diameter
Materials & Supplies Needed
- Yarn: Worsted weight (#4) 100% cotton yarn, approximately 15 yards per coaster. Cotton is chosen for its absorbency and heat resistance.
- Hook Size: 5.0 mm (US H-8)
- Notions: Tapestry needle for weaving in ends, a locking stitch marker to track the start of rounds.
- Yarn Substitutions: Acrylic yarn may be substituted if heat resistance is not required, though cotton provides a firmer, more professional finish. Using a lighter weight yarn (DK or Sport) will result in a smaller coaster, while using a bulky weight yarn will increase the size.
Stitch Guide & Abbreviations (US Terms)
- MR = Magic Ring: A method to start a circle by wrapping yarn around fingers to form an adjustable loop.
- ch = Chain: Draw yarn through the loop on the hook.
- sc = Single Crochet: Insert hook into stitch, yarn over, pull up a loop, yarn over, pull through both loops on hook.
- inc = Increase: Work 2 single crochet stitches into the same stitch to add volume to the round.
- sl st = Slip Stitch: Insert hook, yarn over, pull through both the stitch and the loop on the hook.
- st/sts = Stitch/Stitches
Step-by-Step Pattern Instructions
Coaster Body
- Rnd 1: Start with a MR. Work 6 sc into the ring. Place a stitch marker in the first stitch. (6 sts)
- Rnd 2: Work 2 sc in each st around. (12 sts)
- Rnd 3: 1 sc in next st, 2 sc in next st repeat from * to * 6 times. (18 sts)
- Rnd 4: 1 sc in next 2 sts, 2 sc in next st repeat from * to * 6 times. (24 sts)
- Rnd 5: 1 sc in next 3 sts, 2 sc in next st repeat from * to * 6 times. (30 sts)
- Rnd 6: 1 sc in next 4 sts, 2 sc in next st repeat from * to * 6 times. (36 sts)
Finishing
Once you complete Round 6, join with a sl st to the first stitch of the round. Cut the yarn, leaving a 6-inch tail. Pull the tail through the final loop and use a tapestry needle to weave the end securely into the back of the coaster. Ensure you pull the MR tail tight to close the center hole before weaving that end in as well. Flatten the coaster with your hands to ensure it sits flush against a surface.
Care & Washing Instructions
- Machine wash your cotton coasters in cold water on a gentle cycle to prevent fraying or color bleeding.
- Lay the coasters flat on a clean towel to air dry, ensuring they retain their circular shape as they lose moisture.
- If the coasters become warped, lightly steam them with a household iron or use a spray bottle to dampen and manually reshape them while pinning them to a flat surface.
Pro Tips & Common Mistakes to Avoid
Maintaining consistent tension is the most important factor for this project. If your stitches are too loose, the coaster will have large gaps; if too tight, the fabric will curl upward rather than lying flat. Always use a stitch marker at the start of each round to avoid losing your place, as continuous rounds lack the visible seam of joined rows. When weaving in your ends, run the tapestry needle under several stitches on the reverse side to prevent them from slipping out over time. If you wish to adjust the size, add more increase rounds—ensure that every increase round maintains the count of 6 additional stitches to keep the circle from ruffling.
Frequently Asked Questions
Can I use a larger hook for this pattern?
Yes, using a larger hook will result in a looser, larger coaster. If you do this, you may need more yardage than the pattern suggests, and the fabric may be less absorbent.
How do I know if I have the right tension?
Your coaster should lay completely flat when placed on a table. If it cups upward, your stitches are likely too tight. If it ripples or ruffles, your stitches are likely too loose.
Is this pattern suitable for complete beginners?
This is a perfect beginner project. It teaches the fundamental concepts of magic rings, circular growth through increases, and finishing techniques without requiring complex stitch patterns.
Am I allowed to sell coasters made from this pattern?
You are welcome to sell finished items made from this pattern. Please check the specific terms provided by the designer or platform where you acquired the pattern for any required attribution or credit.
Your new coaster set adds a touch of handmade charm to your coffee table, keeping surfaces protected while showing off your unique stitch work. Experiment with different yarn weights to turn this design into a larger hot pad or even a decorative wall hanging for your guest room. If you enjoyed this project, share a photo of your finished work on your favorite social media platform to inspire others in the community. Browse our collection of free patterns on the blog to find your next creative project for around the house.