Easy Crochet Pumpkin Pattern: Free Step-by-Step Tutorial
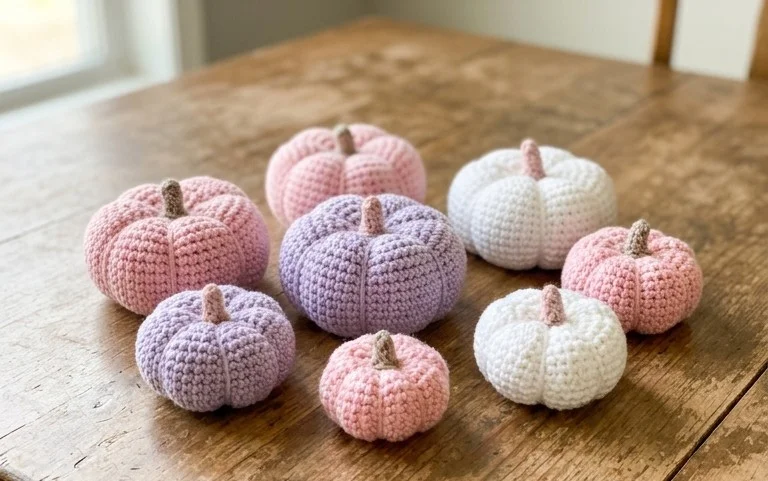
There is nothing quite like the cozy charm of these petite, handcrafted gourds to bring a touch of autumnal magic into your home. With their soft, squishy texture and adorable personality, these palm-sized projects are perfect for beginners craving a quick win or thoughtful gift-makers preparing for the season. You will find immense satisfaction in watching your yarn transform into a rustic harvest staple in just one sitting. Throughout this guide, we will focus on mastering the seamless continuous round technique, ensuring your final pieces look professionally finished and delightfully plump for every spooky corner of your space.
Why You’ll Love This Pattern
This project is the quintessential stash-buster, designed to transform leftover bits of yarn into a functional, charming accessory. Whether you are a beginner looking to master the basic increase or a seasoned pro wanting a meditative, mindless make, this pattern delivers a polished result in just a few hours. Because it works up quickly, it is the perfect solution for last-minute gifts, teacher appreciation tokens, or craft fair inventory. The structure is sturdy yet flexible, ensuring your finished piece holds its shape beautifully over time.
I managed to whip this up in a single evening while watching a movie. The instructions were crystal clear, and the finished item looks so much more professional than I expected. It’s definitely my new go-to gift pattern.
— Sarah, Avid Crocheter
Pattern Overview & Skill Level
- Skill Level: Beginner
- Approximate Time: 2–3 hours
- Construction: Worked in continuous rounds from the center outward, utilizing basic increases to form a flat circular base before transitioning to a seamless spiral.
- Finished Dimensions & Sizing: Approximately 6 inches in diameter; can be easily scaled up by adding more increase rounds.
Materials & Supplies Needed
- Yarn: Worsted weight (#4), 100% Cotton, approximately 80 yards. Cotton is recommended for its stitch definition and heat resistance.
- Hook Size: 5.0 mm (H-8) crochet hook.
- Notions: Tapestry needle for weaving ends, stitch marker to track round starts, and sharp scissors.
- Safe Yarn Substitutions: Acrylic blends may be used, though they will produce a softer, less rigid texture. Ensure your chosen yarn is a true #4 weight to maintain the specified gauge; using a lighter yarn will result in a smaller final project.
Stitch Guide & Abbreviations (US Terms)
- ch: chain
- sc: single crochet
- inc: increase (work 2 sc in the same stitch)
- sl st: slip stitch
- st(s): stitch(es)
- MR: magic ring (an adjustable loop used to start circular projects)
Step-by-Step Pattern Instructions
Main Body
- Rnd 1: Start 6 sc in a MR. (6 sts)
- Rnd 2: Inc in each st around. (12 sts)
- Rnd 3: [Sc in next st, inc in next st] 6 times. (18 sts)
- Rnd 4: [Sc in next 2 sts, inc in next st] 6 times. (24 sts)
- Rnd 5: [Sc in next 3 sts, inc in next st] 6 times. (30 sts)
- Rnd 6: [Sc in next 4 sts, inc in next st] 6 times. (36 sts)
- Rnd 7: [Sc in next 5 sts, inc in next st] 6 times. (42 sts)
- Rnd 8: [Sc in next 6 sts, inc in next st] 6 times. (48 sts)
- Rnd 9: [Sc in next 7 sts, inc in next st] 6 times. (54 sts)
- Rnd 10: Sc in every st around. (54 sts)
- Rnd 11: Sc in every st around, sl st into the first st of the round to finish. (54 sts)
Finishing
Cut the yarn, leaving a 6-inch tail. Pull the tail through the final loop. Use the tapestry needle to weave the end into the back of the work, moving in a circular direction to ensure it remains hidden and secure. Trim any excess yarn flush with the fabric.
Care & Washing Instructions
- Hand wash in cool water using a mild wool/cotton detergent to preserve fiber integrity.
- Gently squeeze out excess water with a towel; do not wring or twist the piece.
- Lay flat on a clean surface and reshape while damp to ensure the circle remains perfectly circular as it dries.
Pro Tips & Common Mistakes to Avoid
- Consistent Tension: Because this is worked in the round, your tension will naturally tighten. If you find the piece is cupping (bowing like a bowl), try using a hook one size larger.
- The Stitch Marker: Always place a stitch marker in the first stitch of every round. It is easy to lose track of where one round ends and the next begins in continuous spiral work.
- Invisible Ends: When weaving in ends, weave into the back loops only. This ensures the yarn does not show through to the “right side” of your project.
- Scaling Adjustments: To make the piece larger, continue the increase pattern (Rnd 4: [Sc in 2, inc]… Rnd 5: [Sc in 3, inc]…) until you reach your desired diameter. Note that this will increase your total yarn requirement by approximately 15-20 yards per round.
Frequently Asked Questions
Can I substitute a different yarn weight for this pattern?
Yes, but keep in mind that changing the weight will significantly alter the finished size. If you use a thicker yarn (Bulky #5), you will need a larger hook and will reach your desired size with fewer rounds.
Is this pattern suitable for absolute beginners?
Absolutely! This pattern uses only the basic single crochet stitch and the magic ring. It is an excellent way to practice working in the round without complex stitch patterns.
Can I sell the items I make from this pattern?
You are welcome to sell your finished handmade items, provided you credit the designer. However, you may not redistribute, sell, or claim the written pattern or images as your own.
What should I do if my circle is not laying flat?
If your piece is curling, you likely need to loosen your tension. If it is ruffling (wavy edges), you have increased too frequently. Ensure you are following the standard increase sequence (adding 6 stitches per round) to maintain a flat surface.
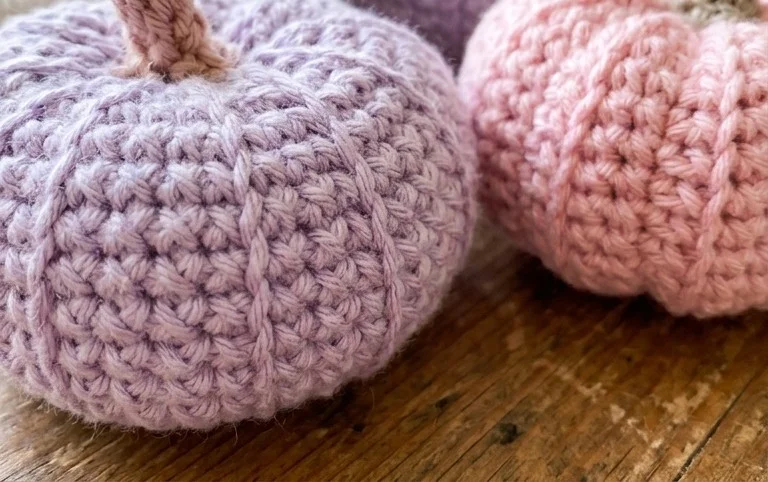
These adorable gourd creations are sure to bring a festive, cozy charm to your home all autumn long. You could even swap the traditional orange for soft velvet yarn or variegated jewel tones to give your patch a modern, whimsical twist. Once your little friends are finished, I would absolutely love to see how they look in your space, so please share your photos on Pinterest or Instagram! Feel free to stick around and browse my blog for more free seasonal patterns.